Sometimes your work calls for printing on both sides of the page — or maybe you’re simply looking to save some paper. On Windows 11, it’s easy to set up double-sided printing for a single print job or make it the default setting for all future print tasks.
Depending on your printer, you’ll either use automatic duplex printing or manual duplex printing. If your printer supports automatic duplex, it will flip and feed the paper for you. If not, you’ll need to manually reload the pages to print on the other side. In this guide, we’ll walk you through the manual duplex method.
Set Up Double-Sided Printing for a Single Print Job on Windows 11
Open the document you want to print in any supported app.
For example, if you’re using WordPad, open your file in WordPad.
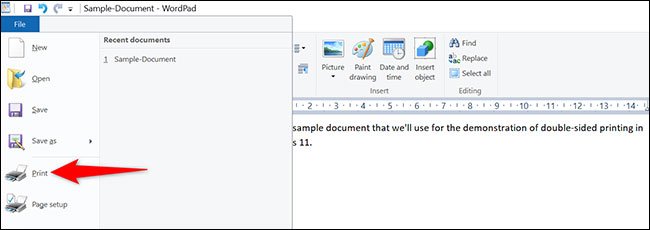
Press Ctrl + P to open the print window.
Alternatively, go to File > Print (this works in most apps).
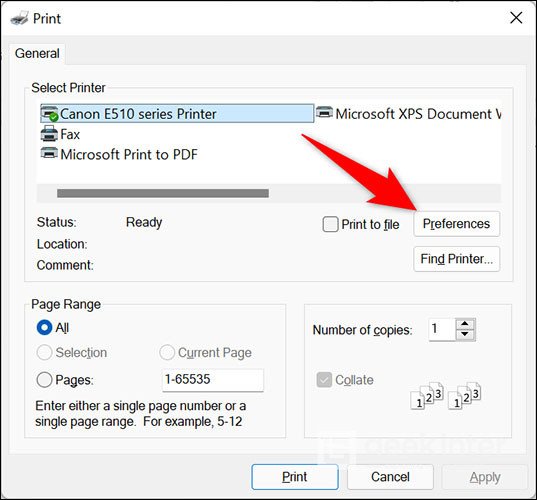
In the print dialog, select your printer, then click Preferences.
In the Preferences window, look for a setting labeled “Duplex Printing (Manual)” or something similar.
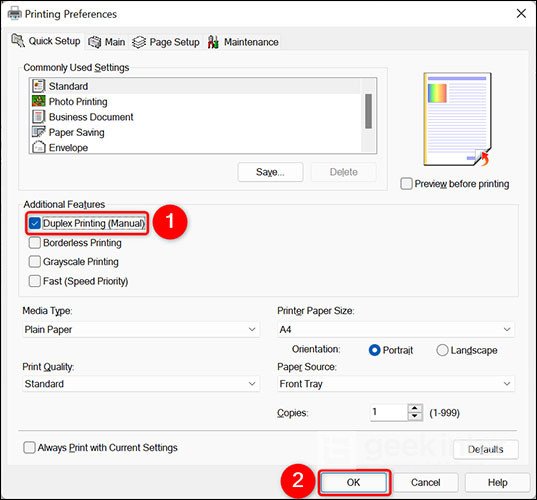
(Tip: If your printer supports “Duplex Printing (Automatic)”, select that instead — it will handle both sides automatically.)
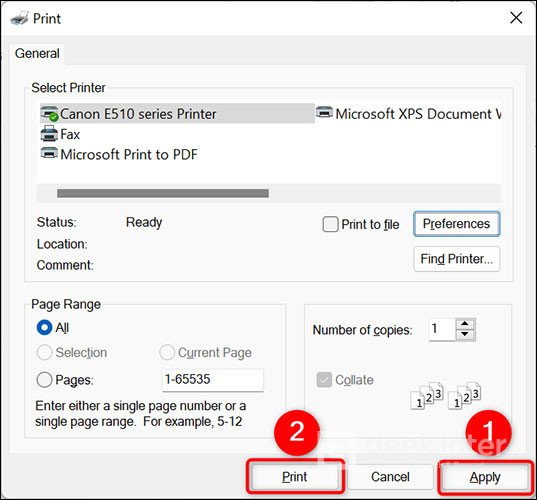
Once selected, click Apply, then click Print to begin printing your document double-sided.
Set Double-Sided Printing as the Default on Windows 11
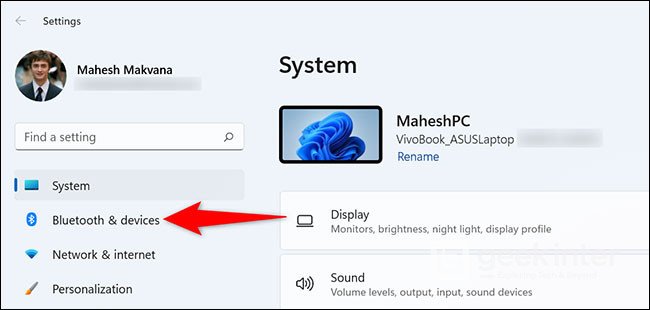
Press Windows + I to open the Settings app.
In the left-hand menu, click Bluetooth & Devices.
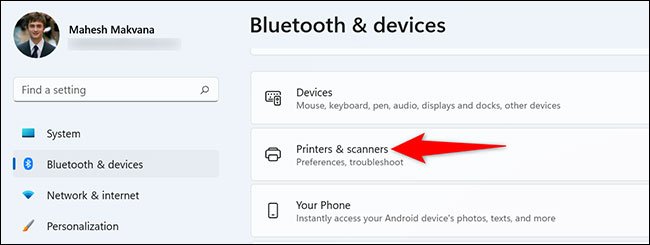
Select Printers & Scanners from the options.
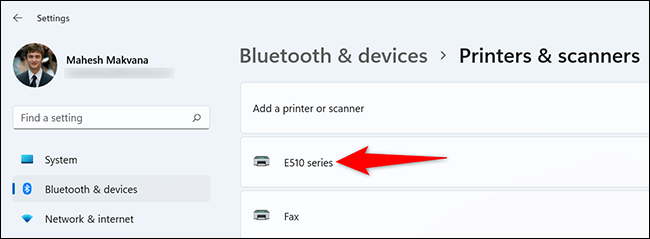
Choose the printer you want to configure from the list.
On the printer’s settings page, click Printer Settings, then select Printing Preferences.
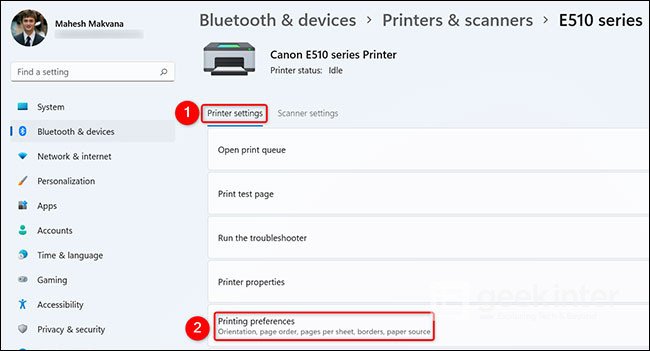
In the Preferences window, enable the option “Duplex Printing (Manual)”.
Click Apply, then OK to save your settings.

That’s it — double-sided printing is now your default print mode on Windows 11.


